Menü
22. October 2024

Install Office with the Office Deployment Tool

Since version 2019, Microsoft Office can be installed with the Office Deployment Tool. With our instructions, this is much easier than it looks at first glance. On this page, we will show you step by step how to install Office 2024, 2021 or 2019.

All relevant links and commands can be found in the instructions.

We also have two short video tutorials for anyone who would like to take a closer look at the installation process. You can find them at the bottom of this page.

Step 1: Create XML file

Before you can start the installation, you need to create a configuration file. The easiest way to do this is with the Office Customisation Tool. Here we will guide you step by step through the creation of the required XML file.

1. Call up Office Customisation Tool

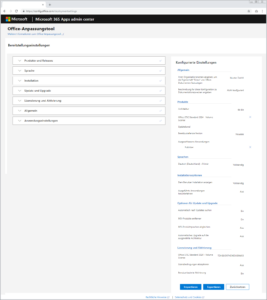
You need an active internet connection to use the Office Customisation Tool. Access this link at https://config.office.com/ and scroll down the website. Click on ” Create new configuration”at the bottom left .

2. Selecting the version and products

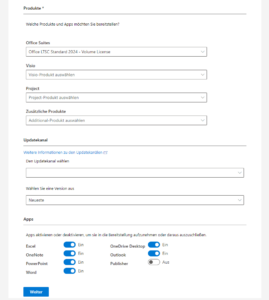
Select the desired bit number (usually: 64-bit) and your Microsoft product. In our example, we would like to install Office 2024 Standard.

3. Set update channel and apps

You can leave the settings for the update channel unchanged. Under Apps, you have the option of selecting which components you want to install and which you do not want to install. In our example, the Publisher is not required and has therefore been deactivated

4. Select language

Then select your preferred language. Optionally, you can add further language packs as required, for example for spelling corrections

5. Installation options and updates

In the selection for the installation options, update and upgrade options, you can simply accept the settings or customise them as required.

6. Licensing and activation

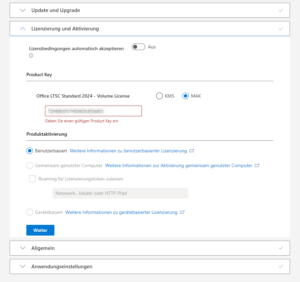
Under Licensing and activation, select whether you want to use KMS or MAK activation. In this example, select MAK and enter your licence key. The tick below should remain on “user-based”.

7. General settings (optional)

You can enter your company name in the General section. However, this is optional

8. Application settings

You can also customise the application settings to adapt the programmes to your individual requirements

9. Finalise configuration

You will find a summary of your configured settings on the right-hand side. Check these once again. If everything is correct, click on “Finish”at the bottom left.

10. Export XML file

In the last step, click on “Export” to create the XML file. If necessary, select your preferred file format and confirm with “OK”. Agree to the licence terms and download the XML file.

Leave the suggested file name unchanged

Step 2: Install Office with the Office Deployment Tool

As soon as the XML file has been created, you can start the Office installation. To do this, you need the Office Deployment Tool from Microsoft. We will show you where you can download it and guide you through the installation step by step.

1. Download Office Deployment Tool

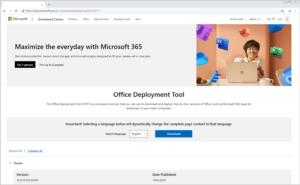
Download the Office Deployment Tool from the Microsoft website using the following link: https://www.microsoft.com/en-us/download/details.aspx?id=49117


2. Run Office Deployment Tool

Open the folder in which the downloaded file is saved. Start the application and accept the terms of use. You will be asked in which folder you would like to extract the files. To do this, create a folder called “Office2024” on the desktop, for example. Save the files in this new folder

3. Add prefabricated XML file

You will then find a setup file and one or more ready-made XML files in the new folder. Now copy the XML configuration file that you created in step 1 into this folder.

4. Copy folder path

Click in the address bar of the folder you have just created and copy the entire path. You will need this for the next step.

5. Change directory in the command prompt

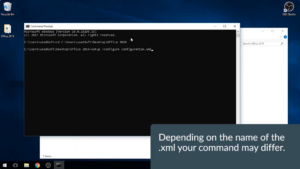
Enter “cmd” in the Windows search to open the command prompt. Enter the following command: cd (for “change directory”), followed by a space and the path of the folder you have just copied (e.g. cd C:\users\usedSoft\Desktop\Office2024). Press enter.

6. Start installation

Now enter the following command in the command prompt: setup configure xml-filename. Replace xml-filename with the name of the XML file that you copied to the folder (e.g. setup configure configuration.xml). Press Enter to start the installation of Office

7. Complete the installation of Office

Wait until the installation process is complete. This may take a few minutes. Once the installation is complete, you can close the open windows.

8. Checking the installation

Open one of the newly installed Office programmes (e.g. Word). Open a blank document and go to File > Account. There you can see whether Office has been successfully activated

Video-Tutorials

Step 1: Create xml file

Um dieses Video zusehen willige bitte Marketing-Cookies zu.

Please accept marketing-cookies to watch this video.

Step 2: Install Office with the Office Deployment Tool

Um dieses Video zusehen willige bitte Marketing-Cookies zu.

Please accept marketing-cookies to watch this video.

Buy licences

more information

Sell licences

more information

Special offers

more information

Install Office with the Office Deployment Tool

Since version 2019, Microsoft Office can be installed with the Office Deployment Tool. With our instructions, this is much easier than it looks at first glance. On this page, we will show you step by step how to install Office 2024, 2021 or 2019. All relevant links and commands can be found in the instructions. [...]
30. September 2024

New in our usedSoft online shop: Easy and secure payment with PayPal

Further upgrade for our usedSoft shop Buying used software online has never been so convenient. In addition to the existing payment methods, PayPal is now also available in our online shop. With PayPal, you not only pay in seconds, but also benefit from the payment service provider's comprehensive buyer protection. You can use PayPal from [...]
26. June 2024

Microsoft CAL Suites: Streamline Your Server Access and Save

Navigating access rights can be quite a task, especially when you're dealing with various Microsoft products that each need a CAL (Client Access License). It's not only complex; it can devour your time. Why not simplify the process and save some money with a CAL Suite? What Exactly is a CAL Suite? A CAL Suite [...]